
As a long-time Mac user, I’ve seen lots of productivity tools come and go, and I’ve used a fair amount of them through the years. Who still remembers Quicksilver (β)? It was pretty awesome at the time… Other notable mentions for me personally are Butler by my dear pal Peter Maurer and LaunchBar. There are also still new kids on the block, like RayCast which even offers ChatGPT integration.
However, the one I keep coming back to and that is running 24/7 on my Mac is Alfred. I particularly like its combination of easy discoverability of the more mainstream features and the sheer power it hides by default, but offers when you need it.
What can Alfred do for you?

I could fill pages describing the features of Alfred, but there is the original source for that, if you are curious. Today I want to focus on two features that are crucial to how I personally use a Mac: file search and the clipboard history.
When running in the background, Alfred does a few things on its own, like index files and watch your clipboard. But as a user, you interact with Alfred by invoking its window. I have set mine to a rather minimalistic look.

As I hate memorizing keyboard shortcuts, I have set Alfred Preferences to have it show up by double-tapping the control (⌃) key. This enables muscle memory to work on my behalf.
A powerful alternative is to use one of the higher F keys like F18 as Alfred Hotkey in combination with Karabiner-Elements to remap it to the Spotlight key (F4) on my MacBook Pro keyboard.
Clipboard History
To my delight, there is a blog article over at alfredapp.com on exactly that topic, even with the perfect title. Clipboard History: The Feature You Never Knew You Needed.
The basic principle is super simple. The Alfred clipboard history just keeps the last x items you copied to the clipboard (typically using ⌘C), from whatever source. Nowadays, with Universal Clipboard and multiple Apple devices, this includes other Macs you might have and even your iPhone and iPad—amazing in itself.
Where does that stuff go, and how do I retrieve it?
Whatever you copy to the clipboard gets stored by Alfred. Of course, there are lots of options to customize that behavior, like ignoring certain types of data or certain source apps (like password managers).
If you want to access that stored data and use it, simply invoke the direct keyboard shortcut (I have set mine to ⌥⌘C, but can never remember it), or double-tap the control key (⌃⌃) and type the letter c, which offers the Clipboard Viewer as a first search result. Hit enter to confirm.

Now you get to see a list of stuff stored and can immediately access the last 10 items by pressing enter or ⌘1 to ⌘9. Quite convenient in itself, but for me, the real power comes from changing how you work as a result.
Consider the article you are reading right now. For the first paragraph, I needed to gather a few URLs of those products. Instead of going back and forth between Ulysses (the app used to write this article) and Safari (to retrieve the page URLs), I can instead collect all URLs in one go and just put them onto the clipboard by finding the product pages and hitting ⌘C. When I’m done, I head back to Ulysses and paste them in where I need them by making use of the Alfred Clipboard History. Saves me quite a few roundtrips and makes working smoother.
And what about Kaleidoscope?
This wouldn’t be the Kaleidoscope Blog without offering a good integration with Kaleidoscope.
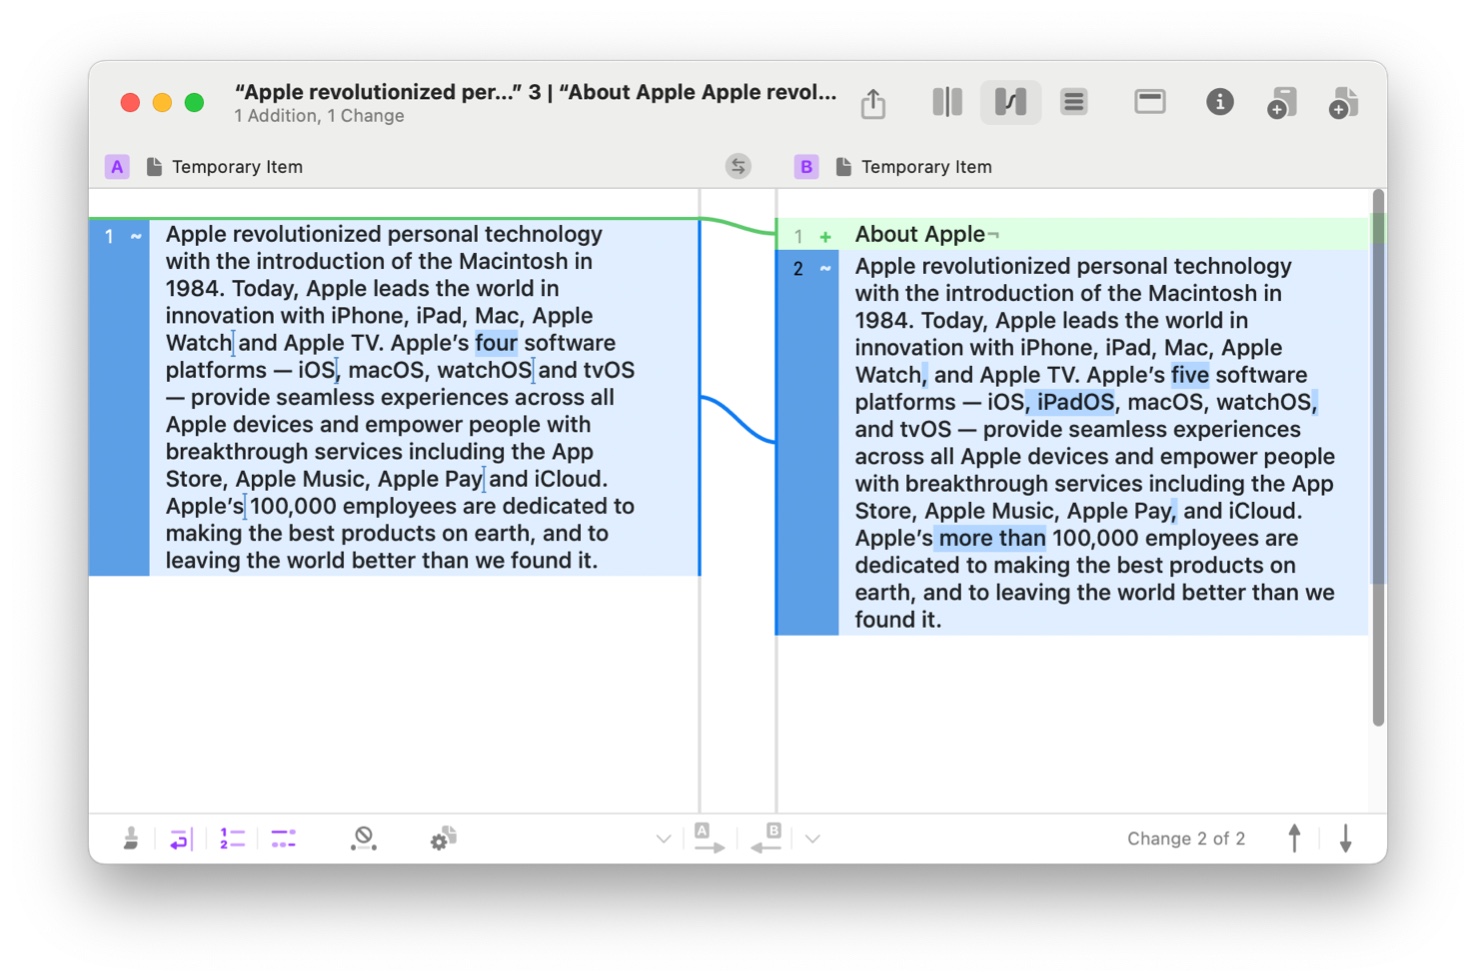
Let’s assume you have found two pieces of text on the web that you want to compare. For the sake of this example, let’s compare the “About Apple” paragraph of text from two Apple press releases. The first one is the iPhone 7 announcement from September 7, 2016. And compare that with iPhone 15 from September 12, 2023.
I’ll scroll down towards the end of the page to find the paragraph starting with “Apple revolutionized”. I select the paragraph with a triple-click and hit ⌘C. Then I repeat the same on the other article.
The following trick assumes you have installed an extension to Alfred, called a workflow. See further down for a link to download that workflow.
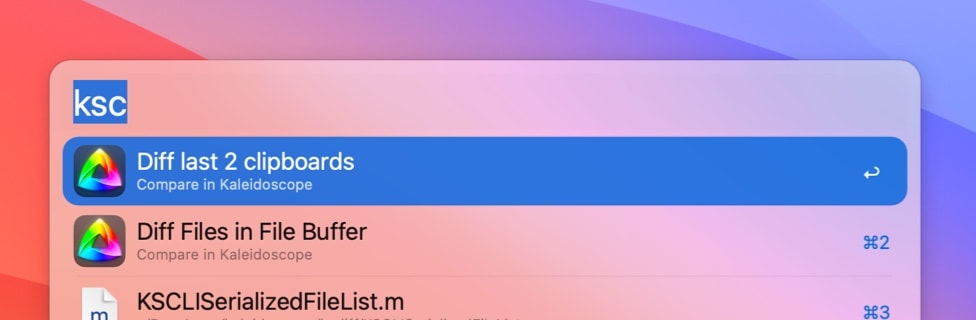
Now I bring up the Alfred window (⌃⌃), then start to type ksclip, but depending on your search index ksc should be sufficient.
Complete the command by pressing the return key (↵). And voila, Kaleidoscope opens and shows us the comparison of those two paragraphs. Apple gained a software platform and a few employees over the last 4 years.
To summarize: Alfred can be extended using workflows, which is a very powerful way of adding entirely new features to Alfred. Here, we are combining the clipboard history feature of Kaleidoscope with the power of the ksdiff command-line tool built into Kaleidoscope to compare the last two pieces of text that were copied to the clipboard. This of course works with all apps that handle text…
File Search
Likely the primary use case for a tool like Alfred or any of the others mentioned above is quickly browsing files. The Mac is very approachable with the Finder and the Open dialog, but both can be slow and cumbersome to use with bigger file systems. And while Spotlight is here to help in those cases, it is still fairly limited. More advanced users will likely look for better options.
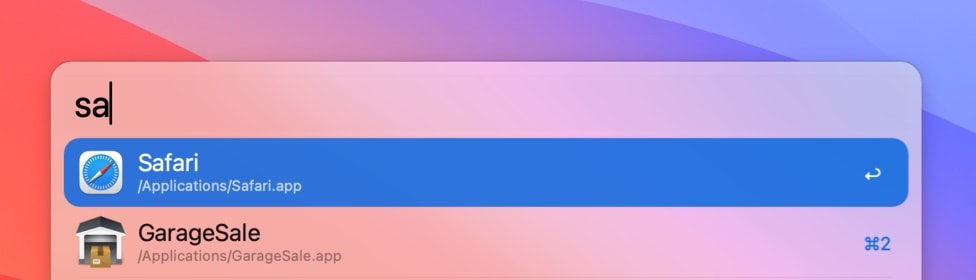
As you would expect, you can bring up the Alfred window, start typing, and Alfred will show you files it finds that match your search. Once you have found what you were looking for, you can hit return (↵) to open that file or the right arrow key (▶︎) to show more commands.
Compare multiple files with Kaleidoscope
Similar to the Clipboard History for all kinds of content, Alfred has a way to keep multiple files around, this is called the File Buffer. Again, there are lots of options to configure in Alfred Preferences.
Let’s put this to use, again using our Kaleidoscope workflow, to compare the files in the File Buffer really quickly.
I remember that there are many table view classes in the Kaleidoscope project, and I even added some recently, but I can no longer exactly remember what their difference was. So much for good class naming.
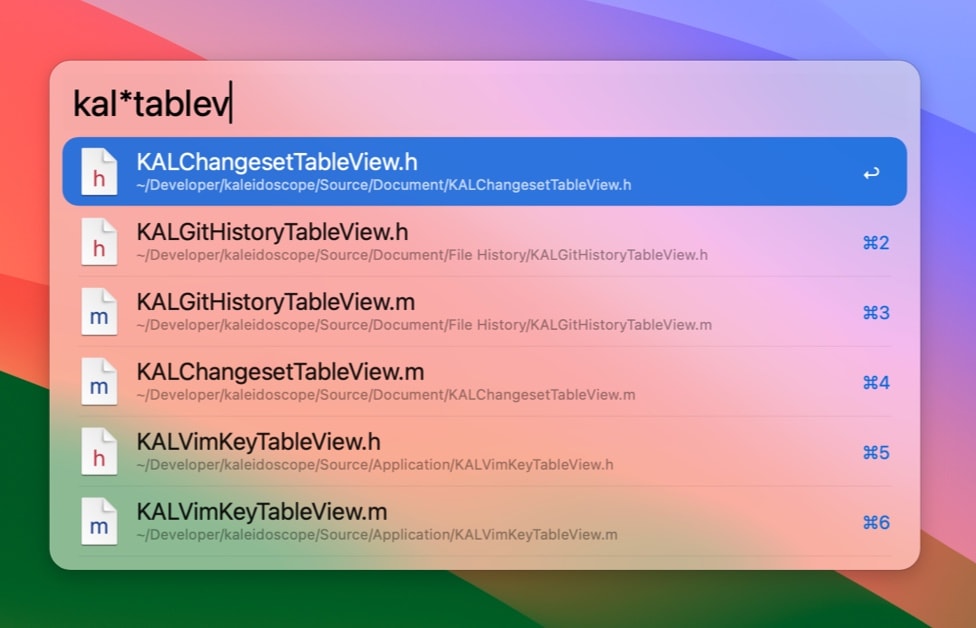
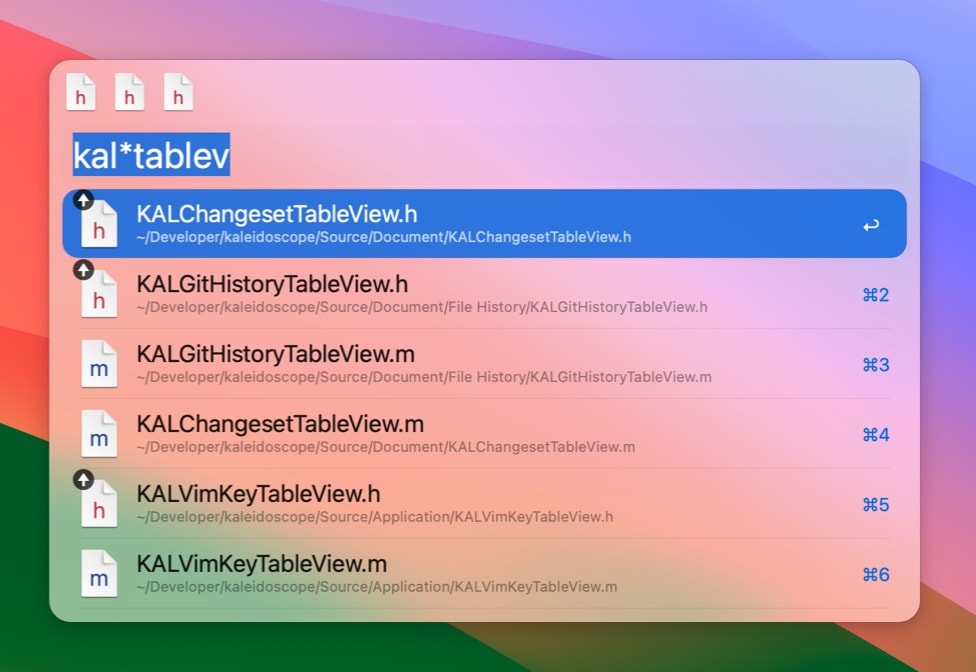
Let’s bring up Alfred and start searching. Class names in Kaleidoscope have a prefix of KAL, plus I know I want something with TableView, so let’s just search for kal*tablev.
Alfred is quick in finding the 6 candidates, 3 headers and 3 implementation files. Here I am interested in the headers.
While located on the first result, I type ⌥▲. This adds that file to the file buffer. Its icon shows up in the top area of the Alfred window, and the file gets a small circled arrow up annotation.
Now I hit ▼, and then again ⌥▲ to add the second .h file to the buffer. Then I move down to the third header and repeat ⌥▲ to add that file to the buffer as well.
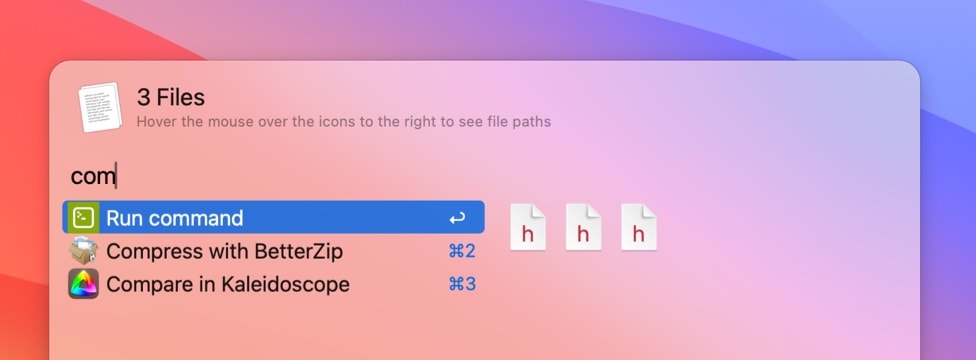
Now that I have my buffer prepared, I want to act on it. For this, I type ⌥▶︎. Now I see many actions offered to me. Luckily I can also filter the list here, so I start typing com.
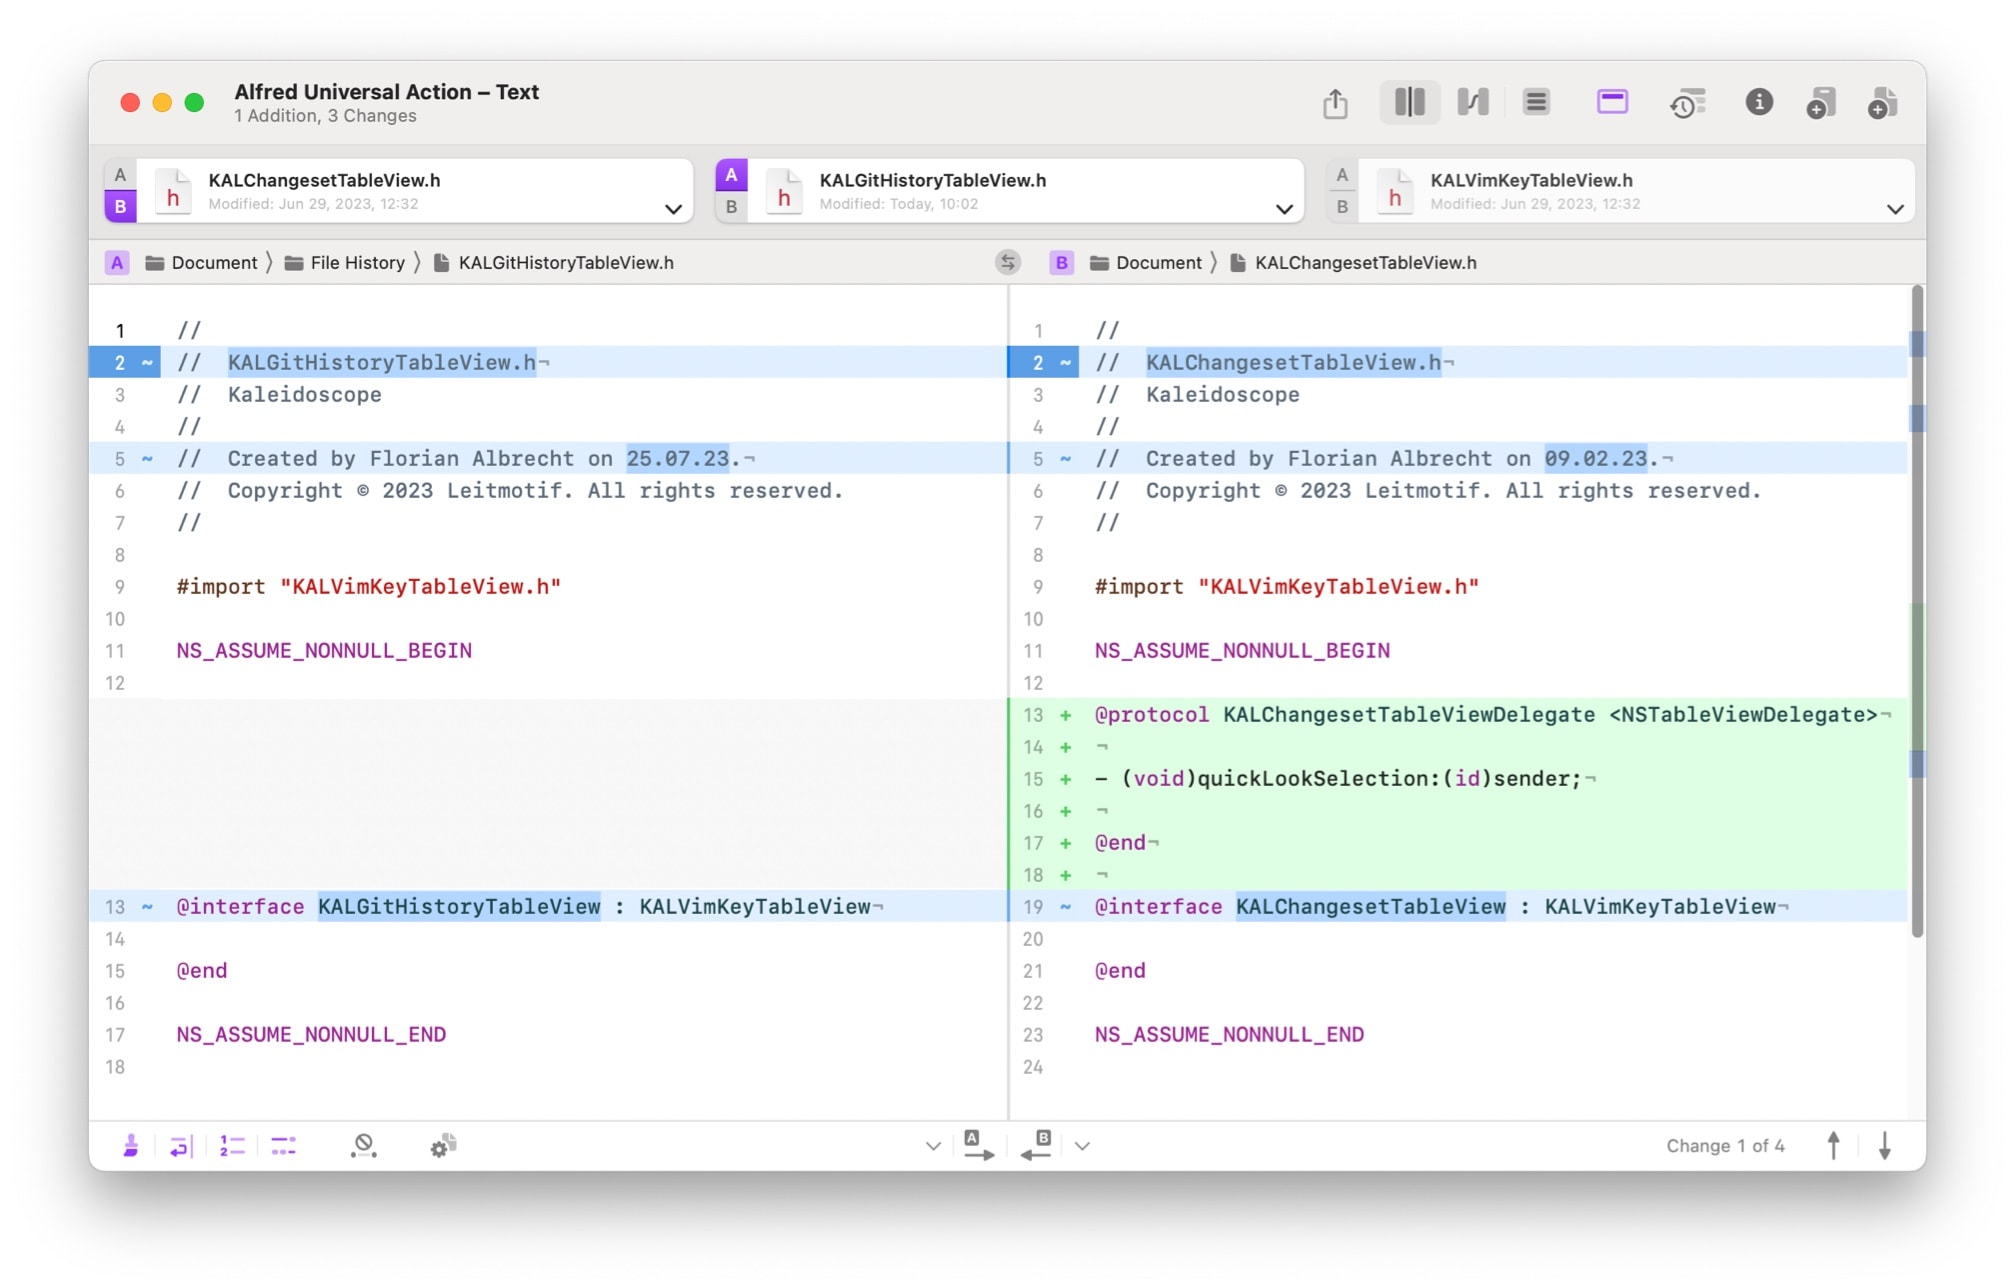
Now I can either scroll down or immediately type ⌘3 to execute Compare in Kaleidoscope. This will open Kaleidoscope and tell it to compare all items in the file buffer. This is not limited to 2 files…
Subtle variations
There are two alternative ways offered by the Kaleidoscope Workflow. Each requires repeating the steps above to get stuff into the file buffer. Once you have gathered all files, just can either hit a keyboard shortcut that you have previously defined in the workflow, or there’s the option of typing kscomp. Both will open the buffered files in Kaleidoscope. The keyboard shortcut is the fastest to use but requires you to set up memorize that shortcut.
Note that the file buffer tricks work with all file types that Kaleidoscope supports. It can be particularly great to compare photos with similar or equal file names, and which may or may not be equal.
The clipboard history on the other hand currently only supports text content.
Get the workflow
When we initially released the workflow, it needed to be installed separately. Nowadays, it comes bundled with Kaleidoscope, to be accessed from the Integration window. Select Kaleidoscope > Integration… from the menu bar, then scroll down and select Alfred from the sidebar. Just follow the instructions on the right to get the workflow installed.

Summary
Both Alfred and Kaleidoscope are rather powerful tools when used alone. But what makes great apps shine is when you combine them with one another and increase your productivity.
Today I demonstrated two of my favorite features of Alfred and combined them with a small (workflow) extension for Alfred, to send content into Kaleidoscope. This adds two more ways of quickly showing differences of arbitrary text content and files on the file system.
The clipboard history is a great way to help streamline your workflow: first copy two pieces of text to the clipboard (where Alfred remembers both of them), then tell Alfred to compare that text using Kaleidoscope. This is much quicker than going back and forth between apps.
The file buffer does a similar thing with files: you first gather a few files you want to combine, without ever leaving Alfred. Then, using a single command, you compare all of those files using the power of Kaleidoscope.
If you know useful tricks not mentioned here, let us know. Or do you miss integration with other tools that are indispensable for you? We’d love to hear…


Great article! I like both Kaleidoscope and Alfred and I find I haven’t used the clipboard history yet. Very informative and useful. Thank you!
Thanks for your feedback! Also feel free to suggest other topics you’d like to read about here 🙂
Comments are closed.