
Merge conflicts can often be the show stopper when there’s a quick task you are try to finish up. While modern version control systems like Git and hg have much more robust merge capabilities, when two people change the same line in a file, even these systems are stymied by the resulting conflict.
In the real world, we usually aren’t so lucky that only one single line conflicts, but we’ll use the example of two people changing the same line as it makes it easier to demonstrate what happens.
Without a merge tool, Git will insert the conflict markers (sometime called conflict dividers) to indicate a merge conflict,. You have likely seen these before.
...
<<<<<<< HEAD
Option 1
=======
Choice 1
>>>>>>>
...
The ======= line is the “center” of the conflict. All the content between the center and the <<<<<<< HEAD line is content in the current branch. Alternatively all content between the center (=======) and >>>>>>> is content that is in our merging branch.
Confused? So are we.
This is where a 3-way merge tool can help.
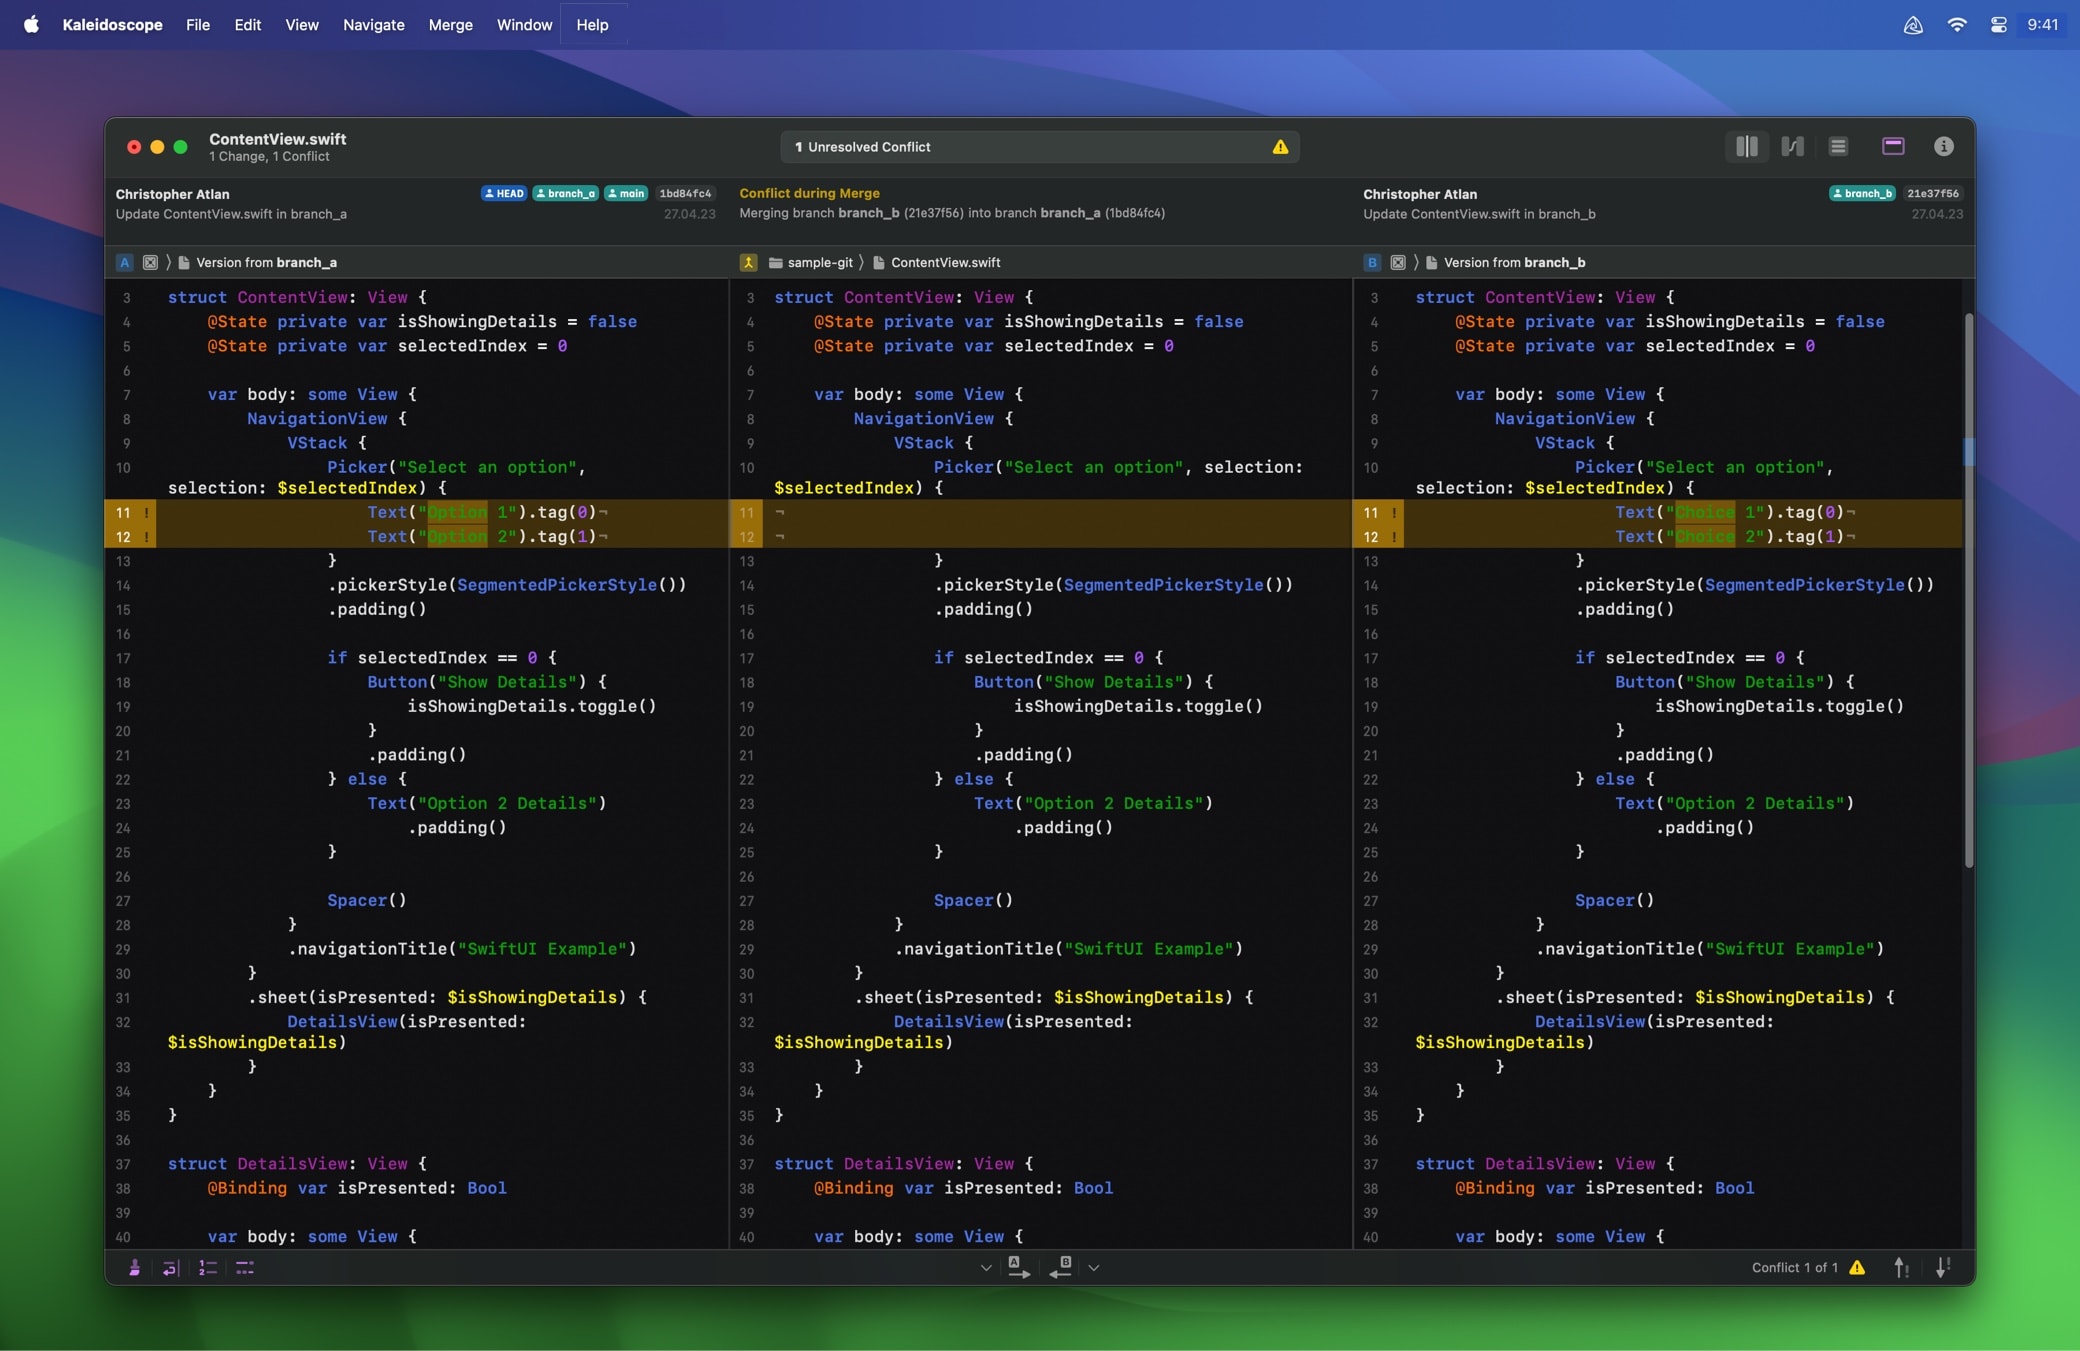
On the left side, you see your current branch; on the right, you see the branch that you are merging. The center holds the final version. Now you can decide if your changes on the left are good, or if the changes in the other branch should supersede yours. And, if it turns out that neither side is the correct resolution, you can edit the code in the center section to get exactly what you need.

After you have picked a side or made edits, you’ll resolve the merge conflict by saving your changes, and then finalize the merge with a commit of the resolved file.