
This is the first in a series describing some of the major new features in Kaleidoscope 4 in more detail, as well as how to use them. Is there a feature you’d like to know more about? Let us know and maybe it will be the focus of a future post in the series.
We have wanted text filters for some time now. Now that we have them, we like them even more than we had imagined. They make possible a brand new category of comparisons.
Why filter text?
Kaleidoscope 4.0 comes with 7 predefined filters. Most of them are designed for immediate real-world use. To illustrate how to use them, I am just going to run a simple and unfinished SwiftUI app to create license files from Xcode, twice, and copy the log output into Kaleidoscope. The results look like this:
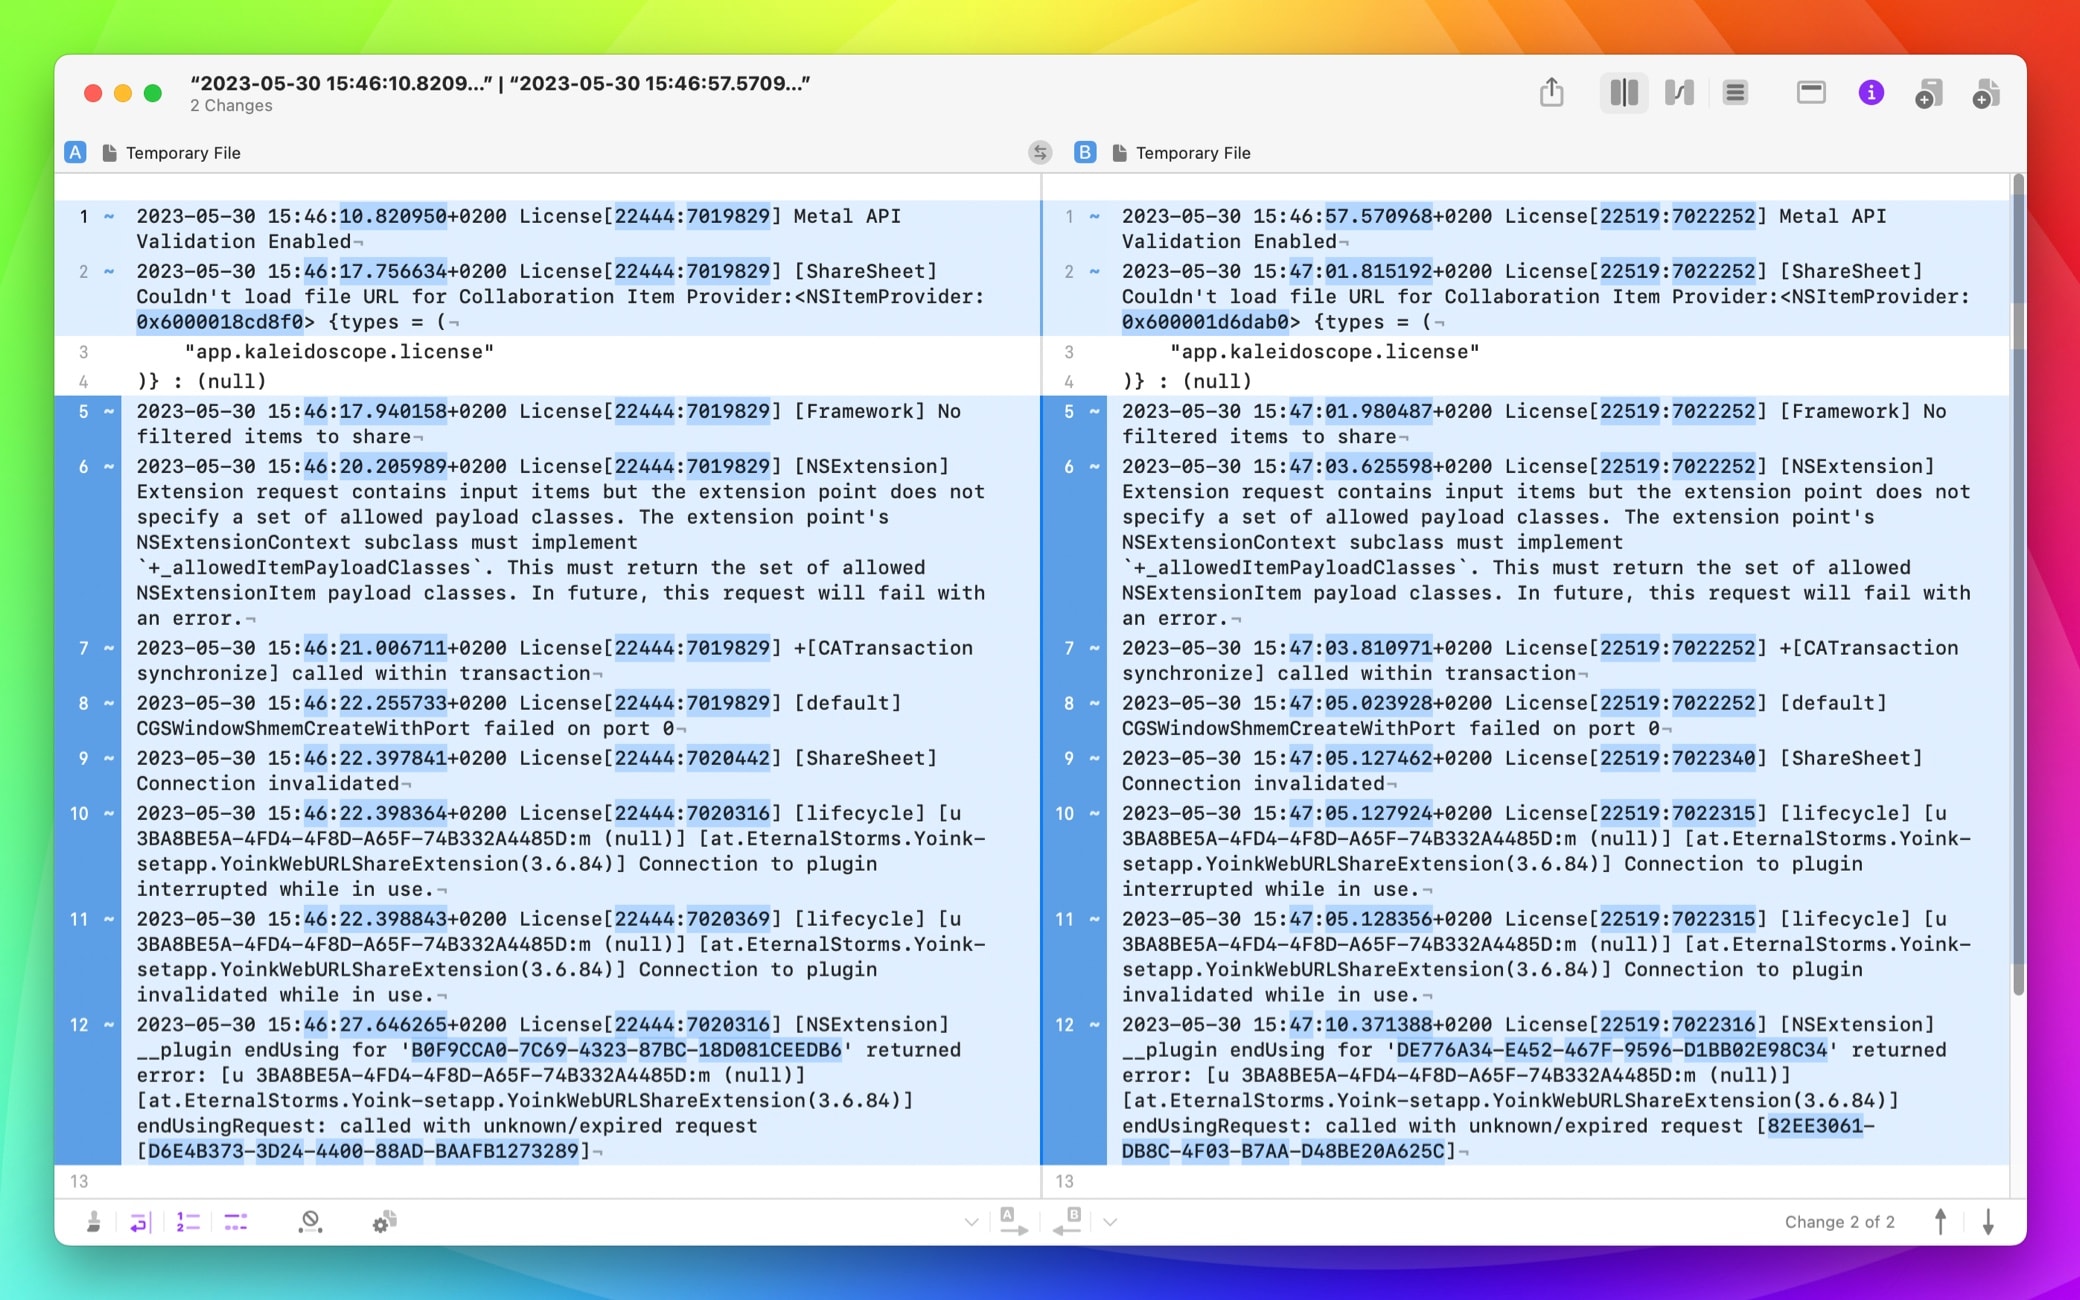
While this result is not hard to understand, it contains a lot of “noise”, i.e. data that is not relevant to finding important differences. Let’s go ahead and clean this up a little.
Click the File Processing toolbar item in the bottom toolbar on the left (![]() ) to show a menu of available options. The second group contains all available filters. No Filter is selected by default. (Hint: Hover over any of the Built-in filters to show a tooltip with a short explanation of what it does.)
) to show a menu of available options. The second group contains all available filters. No Filter is selected by default. (Hint: Hover over any of the Built-in filters to show a tooltip with a short explanation of what it does.)

Now select Ignore Timestamps from that list, and note that now each line in the comparison starts with a clock emoji instead of a lengthy timestamp:
Applying the filter changed all of those timestamps to the same single icon. This does two useful things:
- The filtered comparison is a lot easier on the eyes. You are no longer distracted by all those characters that are not relevant to your current task.
- The timestamps, which were initially labeled as differences, are all converted to the identical clock emoji symbol, and therefore don’t register as differences, letting you focus on the differences that matter.
Next, click on the File Processing in the toolbar again, and select all of these options, in any order:
- Ignore Object Addresses
- Remove Process and Thread IDs
- Ignore UUIDs
Now we see that all of the blue-highlighted changes turn to white, indicating that there are no relevant differences remaining. Instead we have a few more icons, representing memory addresses and unique identifiers.

As you just witnessed, text filters reduce visual noise in a text comparison, noise that distracts from the differences you do care about. Imagine how this will make things easier for you in your own projects.
Text filters are useful in a lot of scenarios, in particular when dealing with generated text like logs or files that contain “random” data, like timestamps or unique identifiers. Those data may be very relevant to the machine reading them, but not to a human trying to make sense of the content.
In this example, you can also see that filters can be combined to achieve the desired result. Just select multiple options from the File Processing menu. To deselect a filter, choose it again from the menu to toggle it off; to reset all filters, select No Filter from the menu.
The Text Filters window
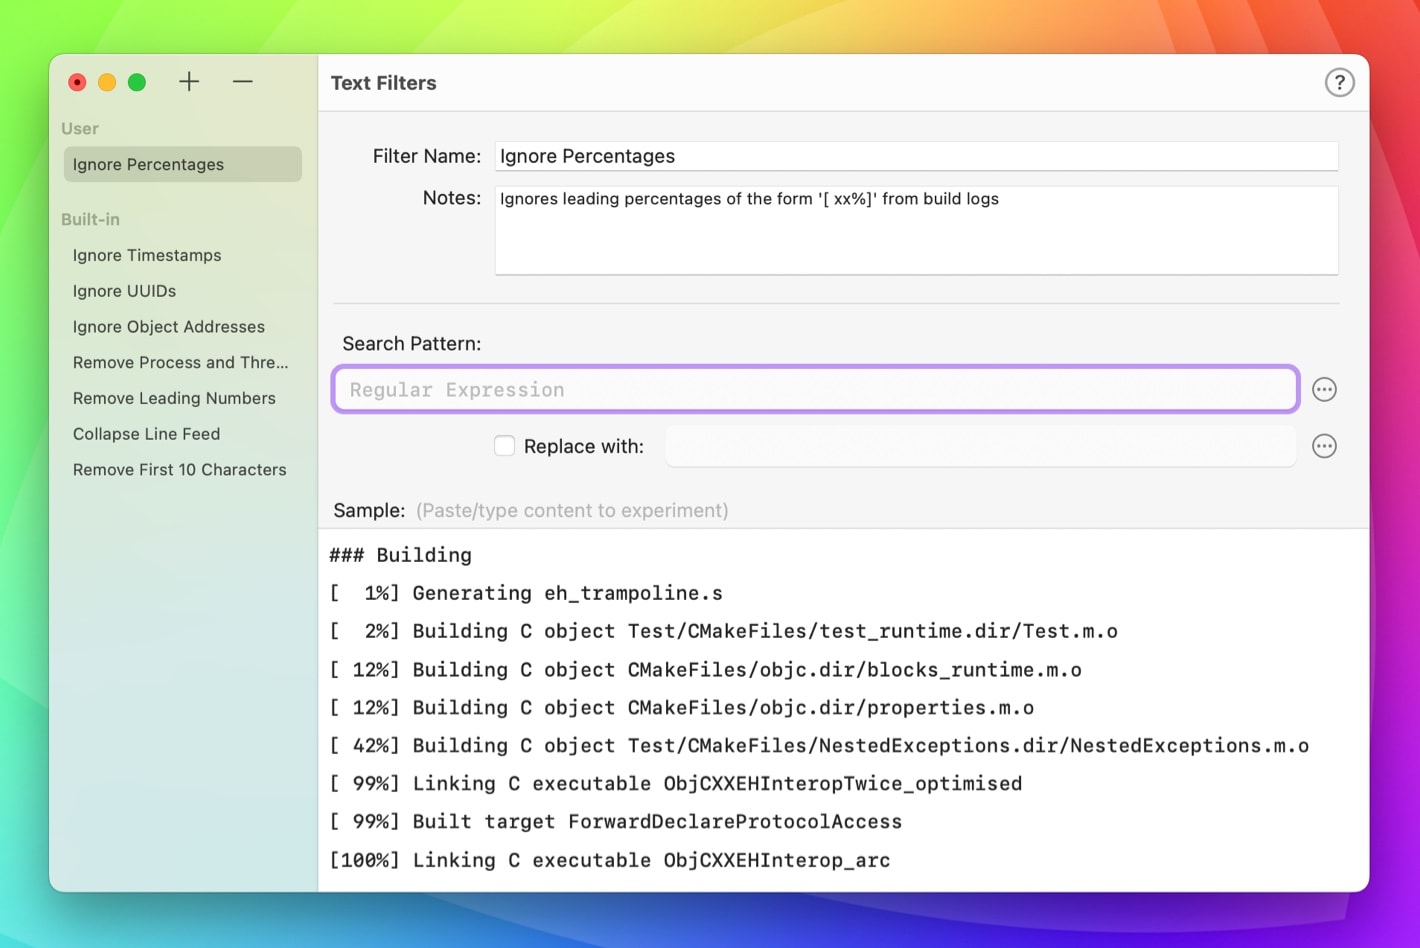
Now let’s look at how filters are defined and, more importantly, how to add our own. In addition to using the File Processing menu item as we demonstrated above, the Text Filters window can be opened by selecting Window > Text Filters from the app menu or, if a document is open, by selecting View > Processing > Edit Filters.

On the left side is a list of all the filters. On the right are the details about the filter selected in the list. The bottom right features an area titled Sample. More on that below.
To create a new filter, click the + button in the toolbar. (If you click the – button, you delete the currently selected custom filter.) The Help button (?) on the top right gives you a very brief overview and a link to the full documentation of the filter syntax used. Filters are based on NSRegularExpression, which is using the International Components for Unicode (ICU) specification for regular expressions.
Creating a Filter
At least for us, writing and reading regular expressions is never fun, so we try to support you in getting things right and documenting the result.
Clicking the + button in the window toolbar will copy whichever filter is selected to create a new one. This can be helpful if you’re trying to solve a problem similar to an existing filter. If not, you can clear out the fields to start from scratch.
For this example, I emptied all the fields and changed the name Ignore Percentages, which is what I want this filter to do. I want Kaleidoscope to ignore the starting percentage values of a build log, e.g. [ 1%], as they most likely won’t match the same lines of the build log on consecutive builds. Those percentages would display as differences that I don’t really care about.
To help me get the expression right, I first collected a short sample of what my log output will look like and pasted it into the bottom Sample area of the window. I also added a note, so I can later remember why I created this filter.
Now let’s start creating the actual search pattern. Those percentage values always start at the beginning of the line. It’s good practice to code this into the pattern, so that we don’t accidentally match other expressions later in the line.
Kaleidoscope has built-in hints that help me find the correct characters for the pattern. In this case, it’s the metacharacter for beginning of a line: ^. Selecting an entry from that popover (shown by clicking ••• at the end of the Search Pattern field) will insert the selected item and replace anything currently selected.

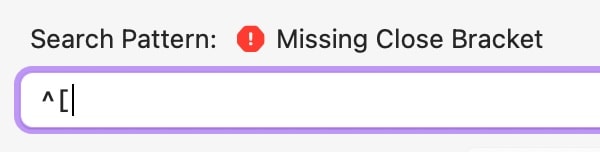
As you continue entering characters, a warning will let you know if the pattern syntax is invalid, and offer an explanation if possible. Of course, if we want a pattern to match the character [ we need to quote it, \[. Otherwise it will be interpreted as opening bracket for a range and an error will be shown as the closing bracket is missing.
As you continue to define the pattern, you will immediately see how well it matches your text below in the Sample area, which is updated in real time. Using \s{0,1} will match zero or one whitespace character, which is why [ 1%] doesn’t match, as there are 2 space characters before the digit. Likewise, \d{1,2} doesn’t match [100%], as in that case we do have 3 digits.
Here’s a pattern that will completely work for our case: ^(\[\s{0, 2}\d(1,3)%\]).
Translated into natural language this means lines starting with [, followed by 0 to 2 whitespace characters, followed by 1 to 3 digits, followed by the % character and ]. You can find all the needed elements in the popover mentioned above.
We also put parentheses () around the entire part in square brackets, to capture this part as a group, so we can replace the entire expression with something else if we want.

Click the ••• button next to the Replace with field to show a popover containing a few emoji characters useful for replacements. Also note that it contains placeholders for previously captured groups, if you defined any in the Search Pattern.
Here’s the finished example for our case. All percentage values were correctly replaced by a single character that clearly shows us that there was something while ignoring the actual content.

As you just witnessed, it’s quite straightforward to create a filter for a particular need. Kaleidoscope supports you in the process by providing useful metacharacters, operators, and character classes; by displaying potential errors in expressions; and by filtering sample data in realtime while you are editing the pattern. In this example, we’ve just scratched the surface. You may also find a lot of useful regular expressions online, ready to use.
If you have trouble coming up with an expression for your use case, or you think that we should add another filter to our built-in list, please don’t hesitate to let us know!