
This is the second article in a two part series about the command line tool ksdiff that comes with Kaleidoscope. In the first part we described the basic usage of ksdiff and explained why it’s worthwhile using it. Today we want to show you how to make the most of Kaleidoscope through the usage of ksdiff. This article covers a few lesser known tips and tricks that can dramatically increase productivity when working with Kaleidoscope. Using ksdiff, you can integrate Kaleidoscope into any workflow that produces text or images and benefit from its comparison capabilities.
For this blog post, we assume you are familiar with command line basics on macOS and you know what ksdiff is and how to use it. If you’re unfamiliar, check out Part 1 of this series. We even have a mini tutorial on how to use the command line and the Terminal app.
There are three powerful features we want to highlight in this article, using the –label option to name the target window, piping content into ksdiff, and process substitution. And there is an advanced bonus hint…
Send content to a specific window
If you have used ksdiff in the past, you may only have only used it with multiple files in one call, as this is the default case. But sometimes, content that you want to compare only surfaces over time. Using the --label (or short -l) option you can run ksdiff over and over while making sure the result ends up in the same window as before. The
ksdiff --label Comparison file1.txt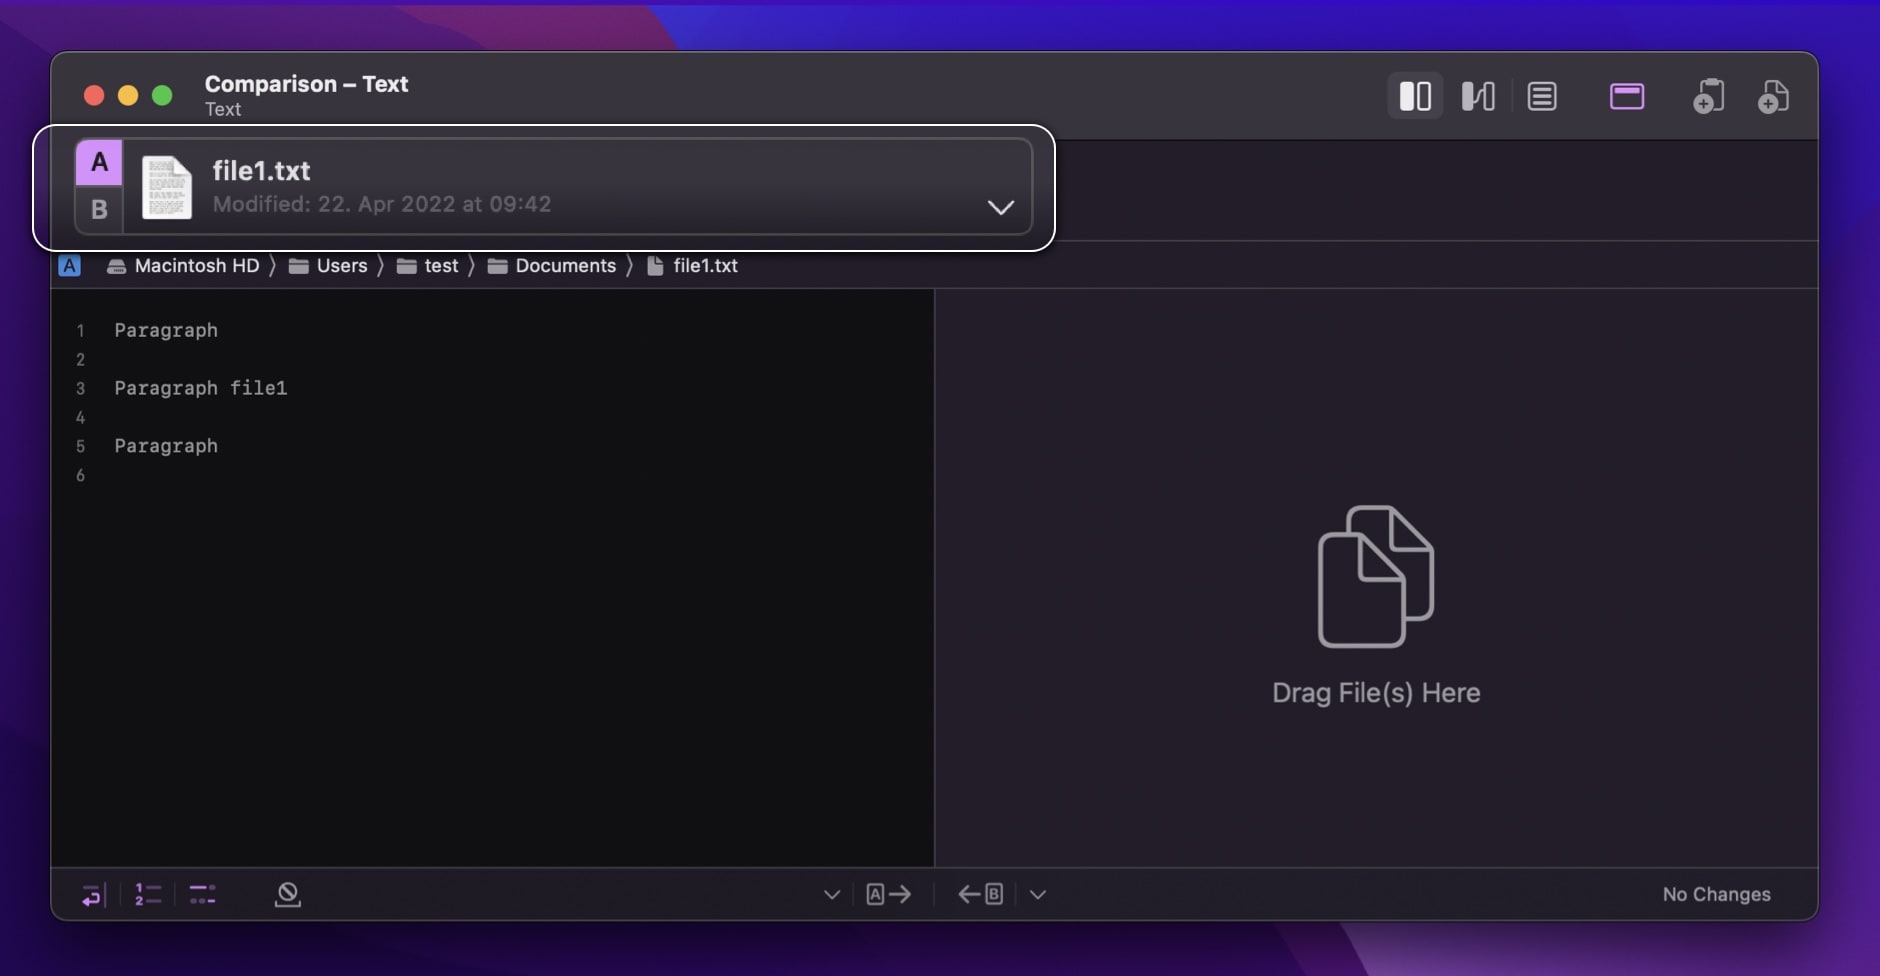
This will open a new window called Comparison in Kaleidoscope, showing file1 as A. The open File Shelf indicates there is only one file, as does the placeholder on the right side. A bit later that same app writes file2. You can compare it with file1 by entering
ksdiff --label Comparison file2.txtNow you see file2 opening as B in the same window titled Comparison. You can repeat these steps as often as you want and then compare any combination of those files.

Piping dynamic content into Kaleidoscope
The label option gets a lot more interesting when working with the dynamic output of other command line tools. We can glue those tools together using a Unix pipe (the | character). To illustrate, let‘s just use the echo command: echo "hello" | ksdiff will open a new Kaleidoscope window with the content hello in side A. This is not very fascinating in itself, even with more interesting commands than echo. But what if we combine pipes and labels? Now we can repeat certain commands and keep sending the results to the same comparison. Try these two lines as a very simple example:
echo "hello" | ksdiff --label "Echo Test"
echo "hello you" | ksdiff --label "Echo Test"
As a syntax variation, you may also combine file and pipe input using the dash (the - character). Here, - is replaced with the content being piped in: echo "test" | ksdiff -
Real-world example: Normalize JSON
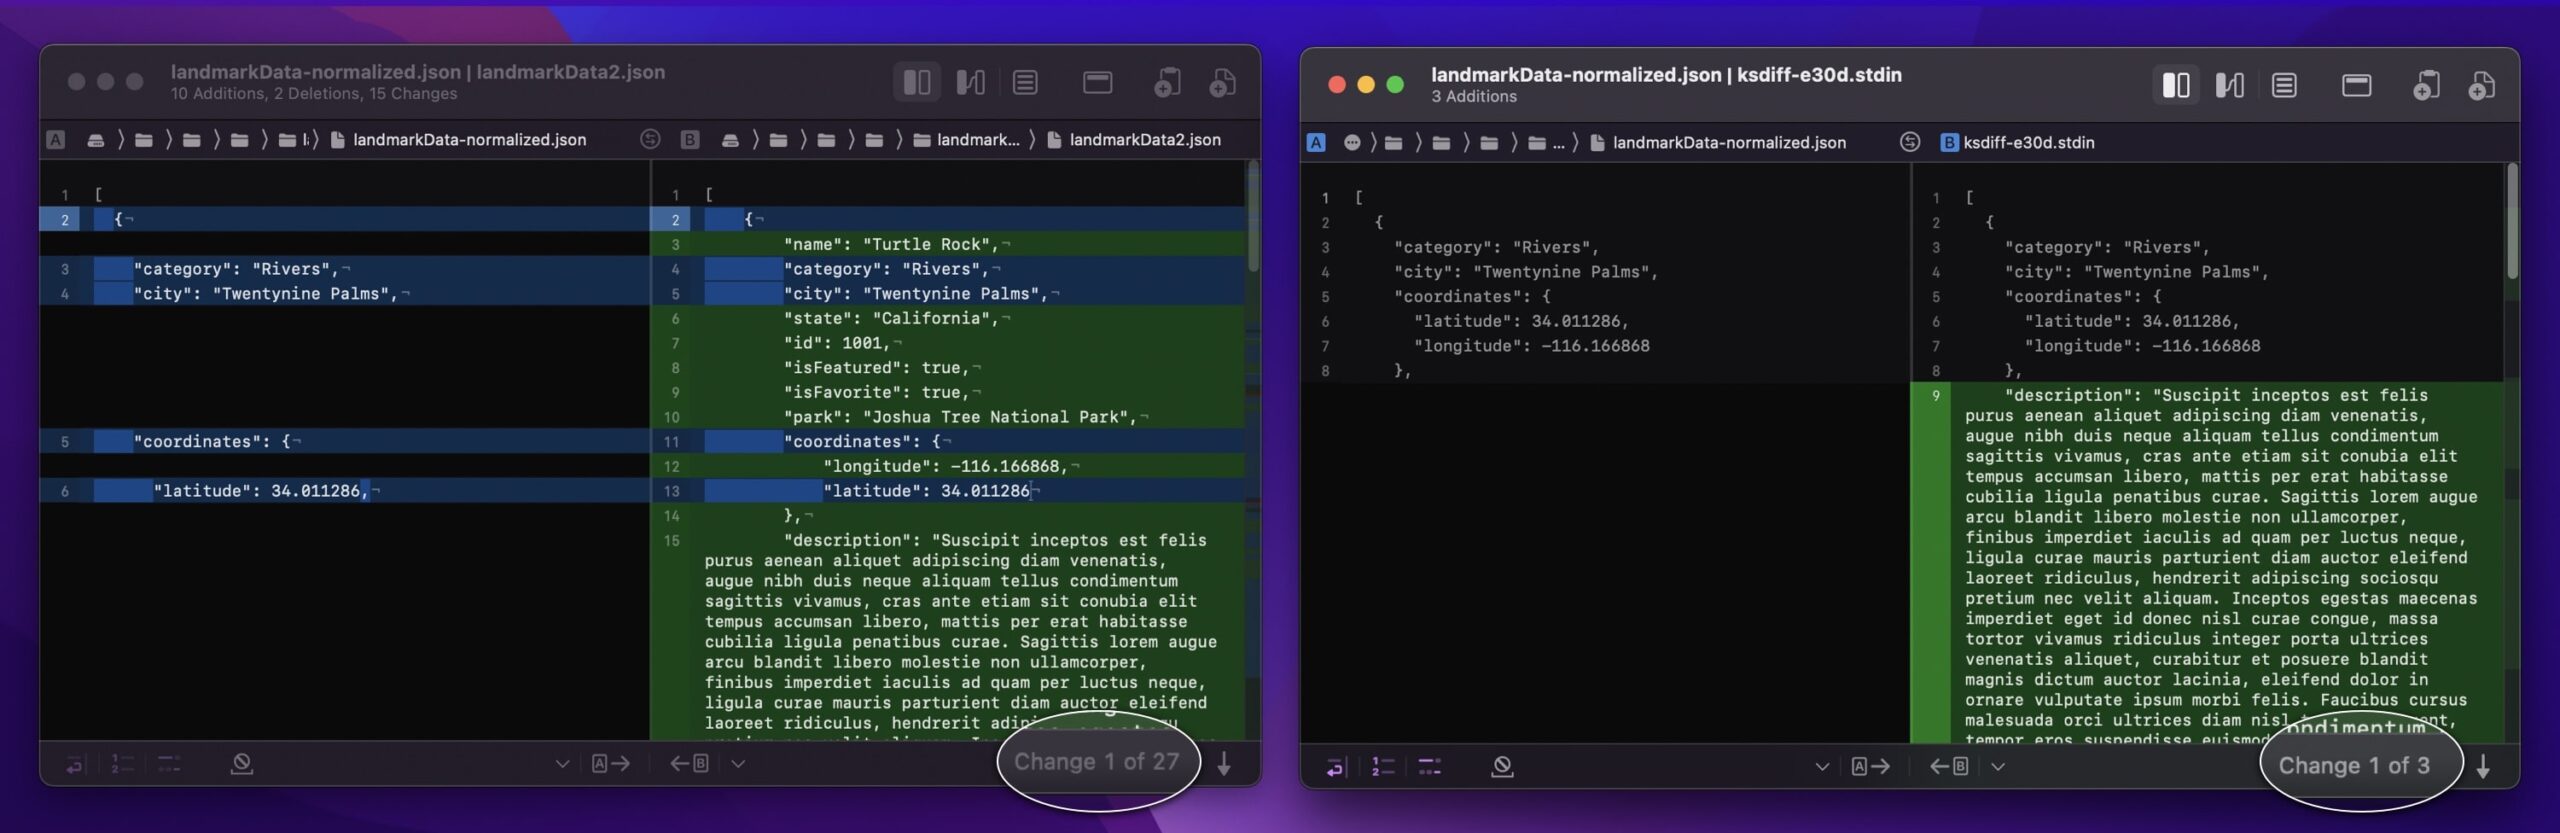
JSON files are notoriously hard to compare, as the order of objects is undefined in JSON. This means that two semantically equivalent files may look very different, and the same file can be different again next time you save it. But most of the time, you care about the semantics of the file, not the representation. In other words, how entries are sorted in a JSON file doesn’t really matter when comparing files or different version of a single file.
That‘s why there are tools to normalize JSON content by bringing objects into a certain well-defined order. jq is a popular tool for that job. Let’s say you want to ensure as part of a test that a generated JSON file (here landmarkData2.json) matches a normalized template file (landmarkData-normalized.json) you created before. You could pre-process that generated file, save it out, and then compare it to the original using Kaleidoscope, but that may not suit your workflow. As an alternative, you can pre-process on the fly:
jq . -S landmarkData2.json | ksdiff landmarkData-normalized.json -This sounds like a small difference, but it can save you a lot of hassle when working with an automated process such as a test case.
Can I use multiple pipes?
But what if you want to compare multiple dynamic inputs simultaneously, instead of one after the other? Unix also has a solution for this, and ksdiff has supported it since version 3.3: it‘s a construct called process substitution. Instead of echo "test" | ksdiff you may also write ksdiff <(echo "test"). As this construct no longer requires chaining (piping) of commands, you can use it multiple times:
ksdiff <(echo "test") <(echo "some other test")Real-world example: Compare image file compression
Let‘s say we want to compare the quality between image compression settings. We’ll compress the source image two times and send the result to ksdiff, using process substitution. We’re using pngquant, a tool to compress PNG images by reducing the number of colors used. We might also want to compare each compressed version with the original, so we add that too:
ksdiff <(pngquant 4 milad-fakurian.png -o -) <(pngquant 256 milad-fakurian.png -o -) milad-fakurian.pngThis is a elegantly simple solution. If you tried to achieve the same thing using an image editor such as the excellent Acorn, you‘d have to open the image, export it, select PNG, check Index PNG colors and a setting, choose a destination folder and a file name—and then you’d need to follow the same steps again using a different setting. Once done you could you drag the original and the two exported files onto Kaleidoscope for comparison.

Photo by Milad Fakurian on Unsplash
Bonus: Comparing folders as changesets
Our final example is a bit of an edge case, but the solution can come in really handy if you need it.
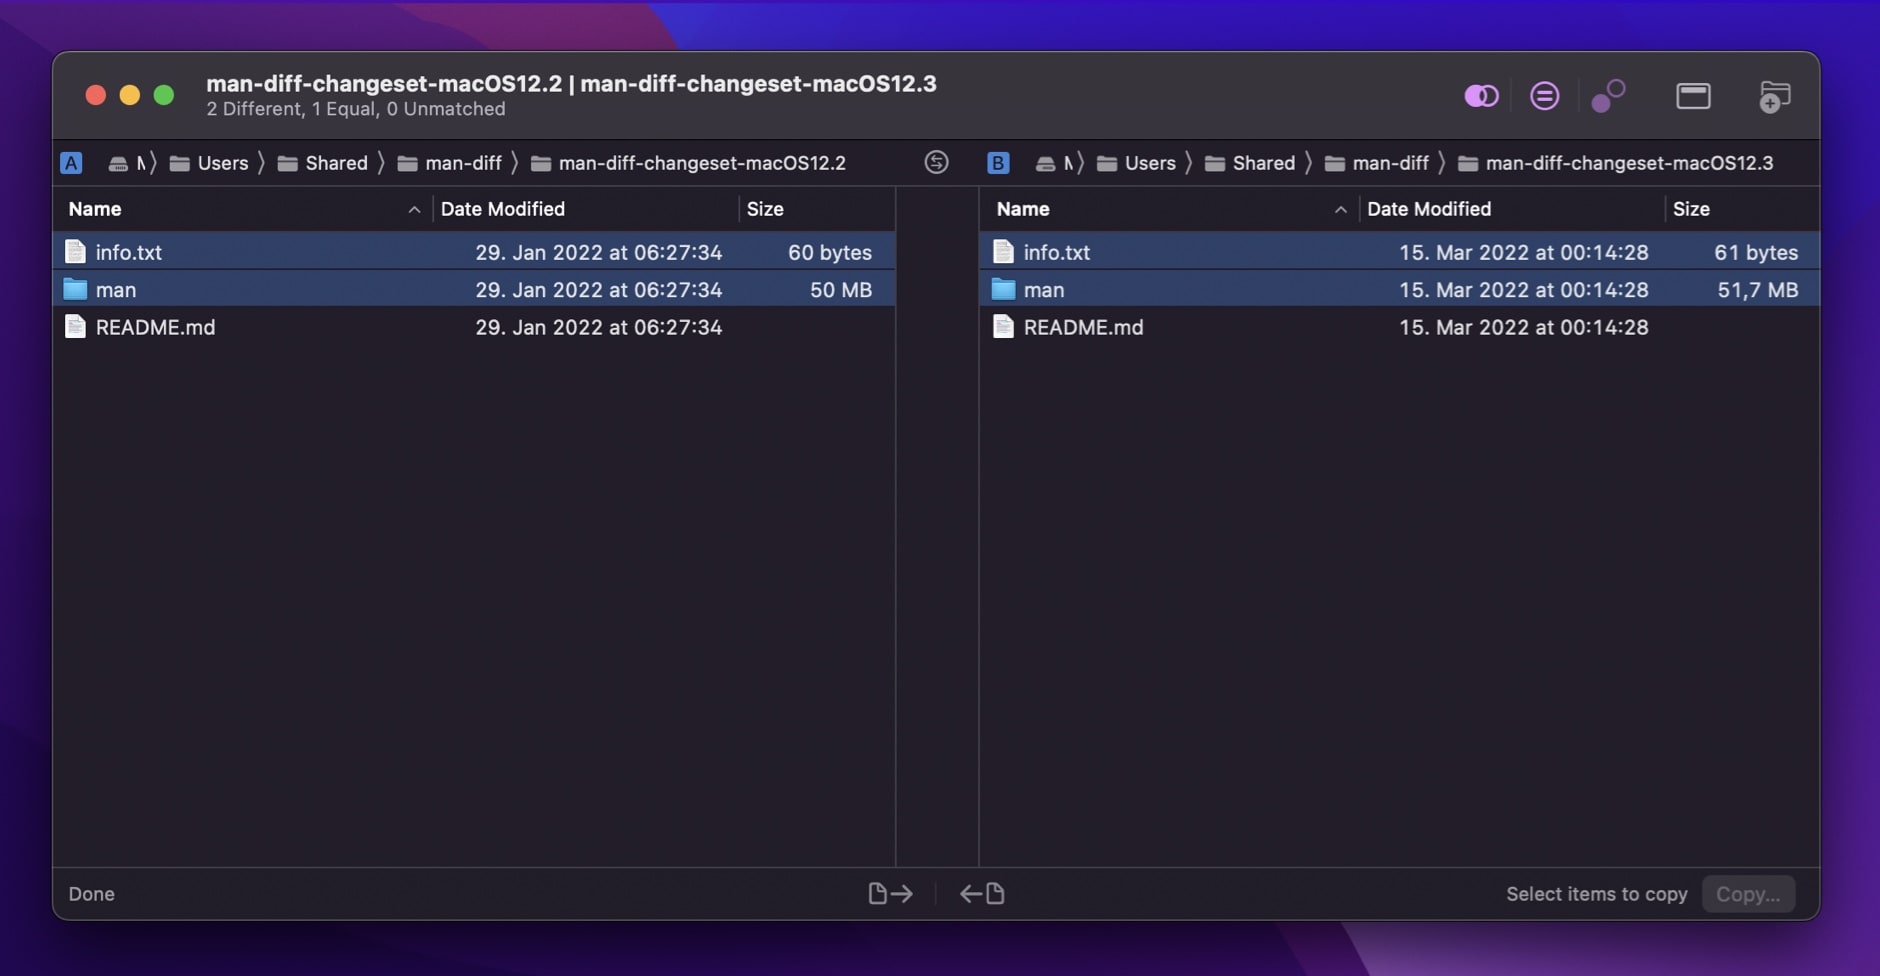
You may have noticed that Kaleidoscope does something rather special when comparing two states of a version control system, git difftool being the primary example. In this case, Kaleidoscope shows you a window with two columns. The left column contains a sidebar showing all files that have changed, while the right column shows you the specific changes of the file selected in the sidebar.
For changesets, this is usually more useful than looking at two folders, which is what the folder comparison does. The folder comparison focuses on changes of a folder’s contents, whereas the changeset focuses on changes in the contents of the files. When working with a version control system like git, most of the time you tend to modify files rather than add, delete, or move them.
But sometimes you end up in a situation where you have two local folders and you know the files are mostly the same, but you need to know the exact content changes. Folder comparison can be tedious to use for that, as you need to navigate through the whole folder hierarchy in order to see see any file changes. Recently, we had a customer with two local “checkouts” of a repository. In that case, using the folder comparison to find the handful of changes within files was not fun.
For the changeset to work in the way it does, Kaleidoscope really needs a version control system like git to do some of the heavy lifting.
We developed a shell script that combines the power of git and Kaleidoscope to give you that solution using these steps:
- Create a new git repository
- Add the contents from the first folder you provide
- Commit that state into the repository
- Empty the working copy
- Copy the contents of the second folder into the working copy
- Add new files (if any)
- Commit the changes
- Call git difftool using Kaleidoscope.
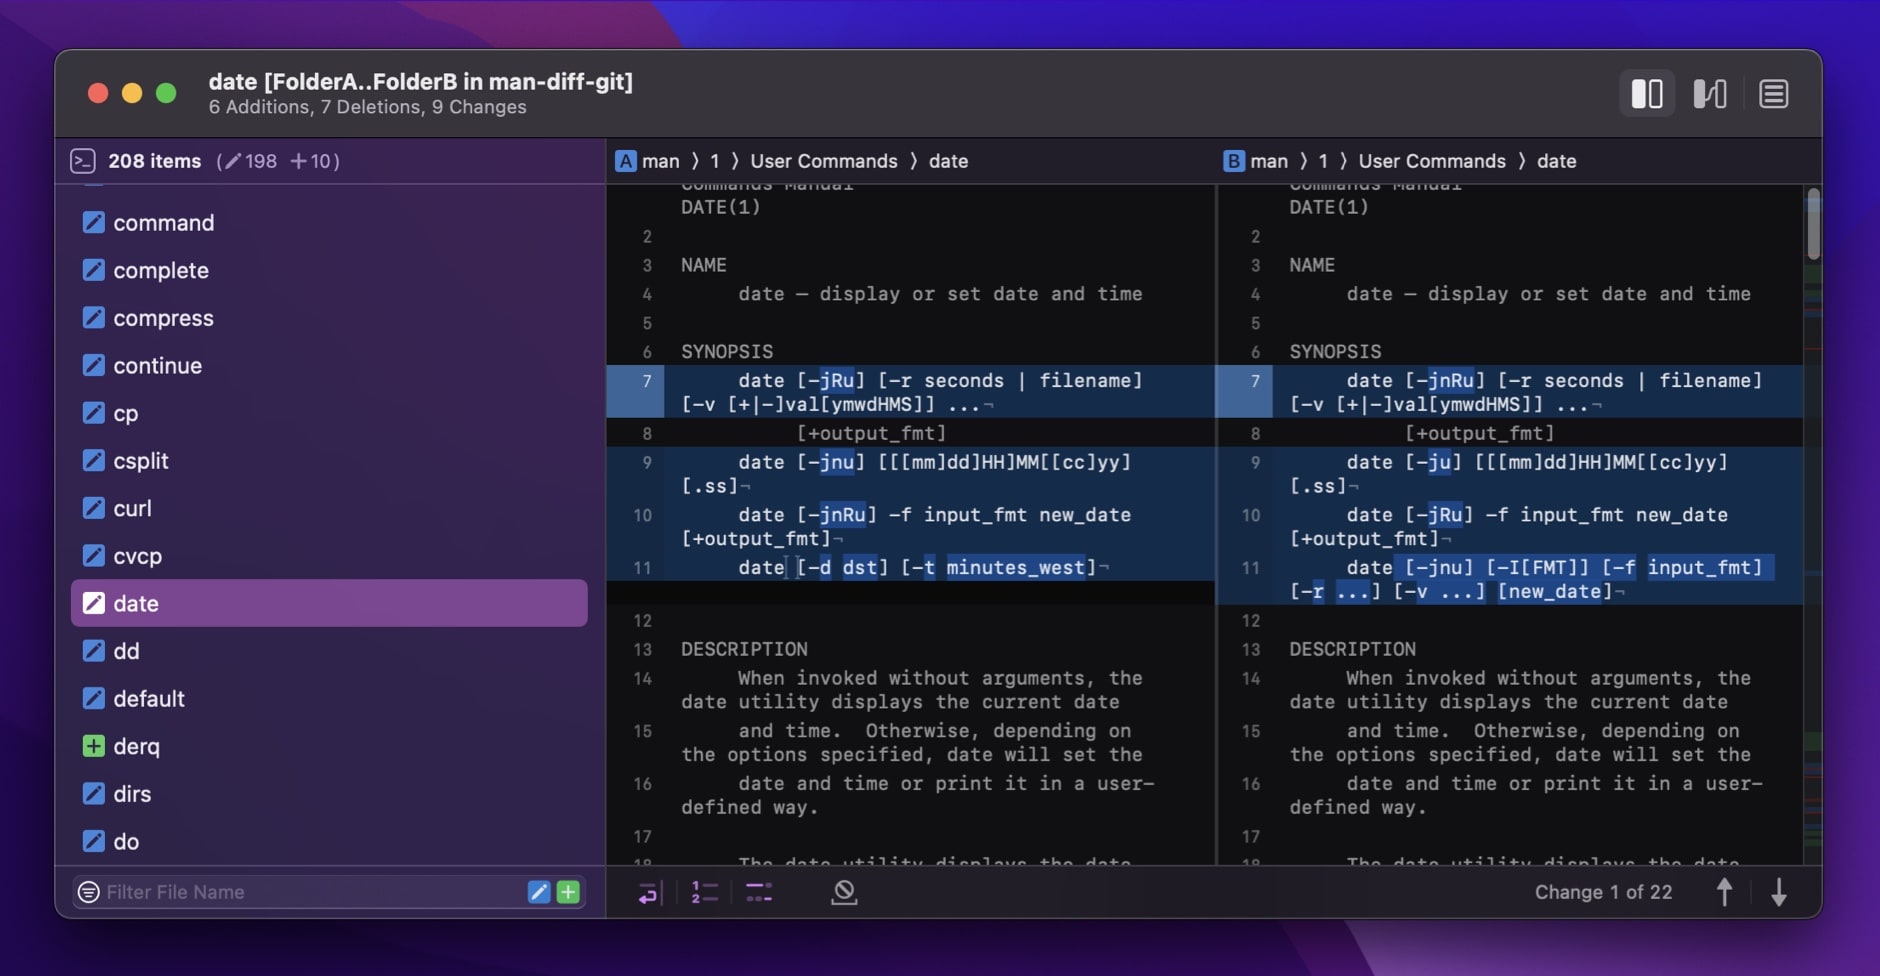
Now you can compare the changes between the two commits, in Kaleidoscope’s familiar changeset UI. Once finished, you can choose to delete the repository, or keep it for future reference.
Download the script from GitHub.
Let us know how you are using ksdiff!
As usual, we are eager to hear about your workflows and use cases. Do you have a unique use case for ksdiff you’d like to share? We love inspiring other users. We’d also love to keep improving Kaleidoscope and ksdiff to suit your needs, so let us know what those needs are.
