
In the first part of this series, we introduced the File Shelf in Kaleidoscope and its benefits when working with multi-file comparisons. In this second and final part, we will look at how to deal with content coming from the clipboard, from integrations such as the ksdiff tool, or from Git.
Clipboard Content
Assume you are working with ChatGPT to iteratively optimize a paragraph of text to your liking. Let’s compare the various versions of the output using Kaleidoscope. For this example, I am using Raycast Pro. I am typing a few prompts in an attempt to get a brief explainer of the Roman Empire. I am adding each of the responses to Kaleidoscope as I go. (See the sidebar box for details.)
Now I have several pieces of text in Kaleidoscope, each represented by an entry in the File Shelf. In this case, we can see that “files” in File Shelf can also be temporary clipboard content. Further on in this post, we will also see that they can be the results of Unix pipes or Git revisions of a file.
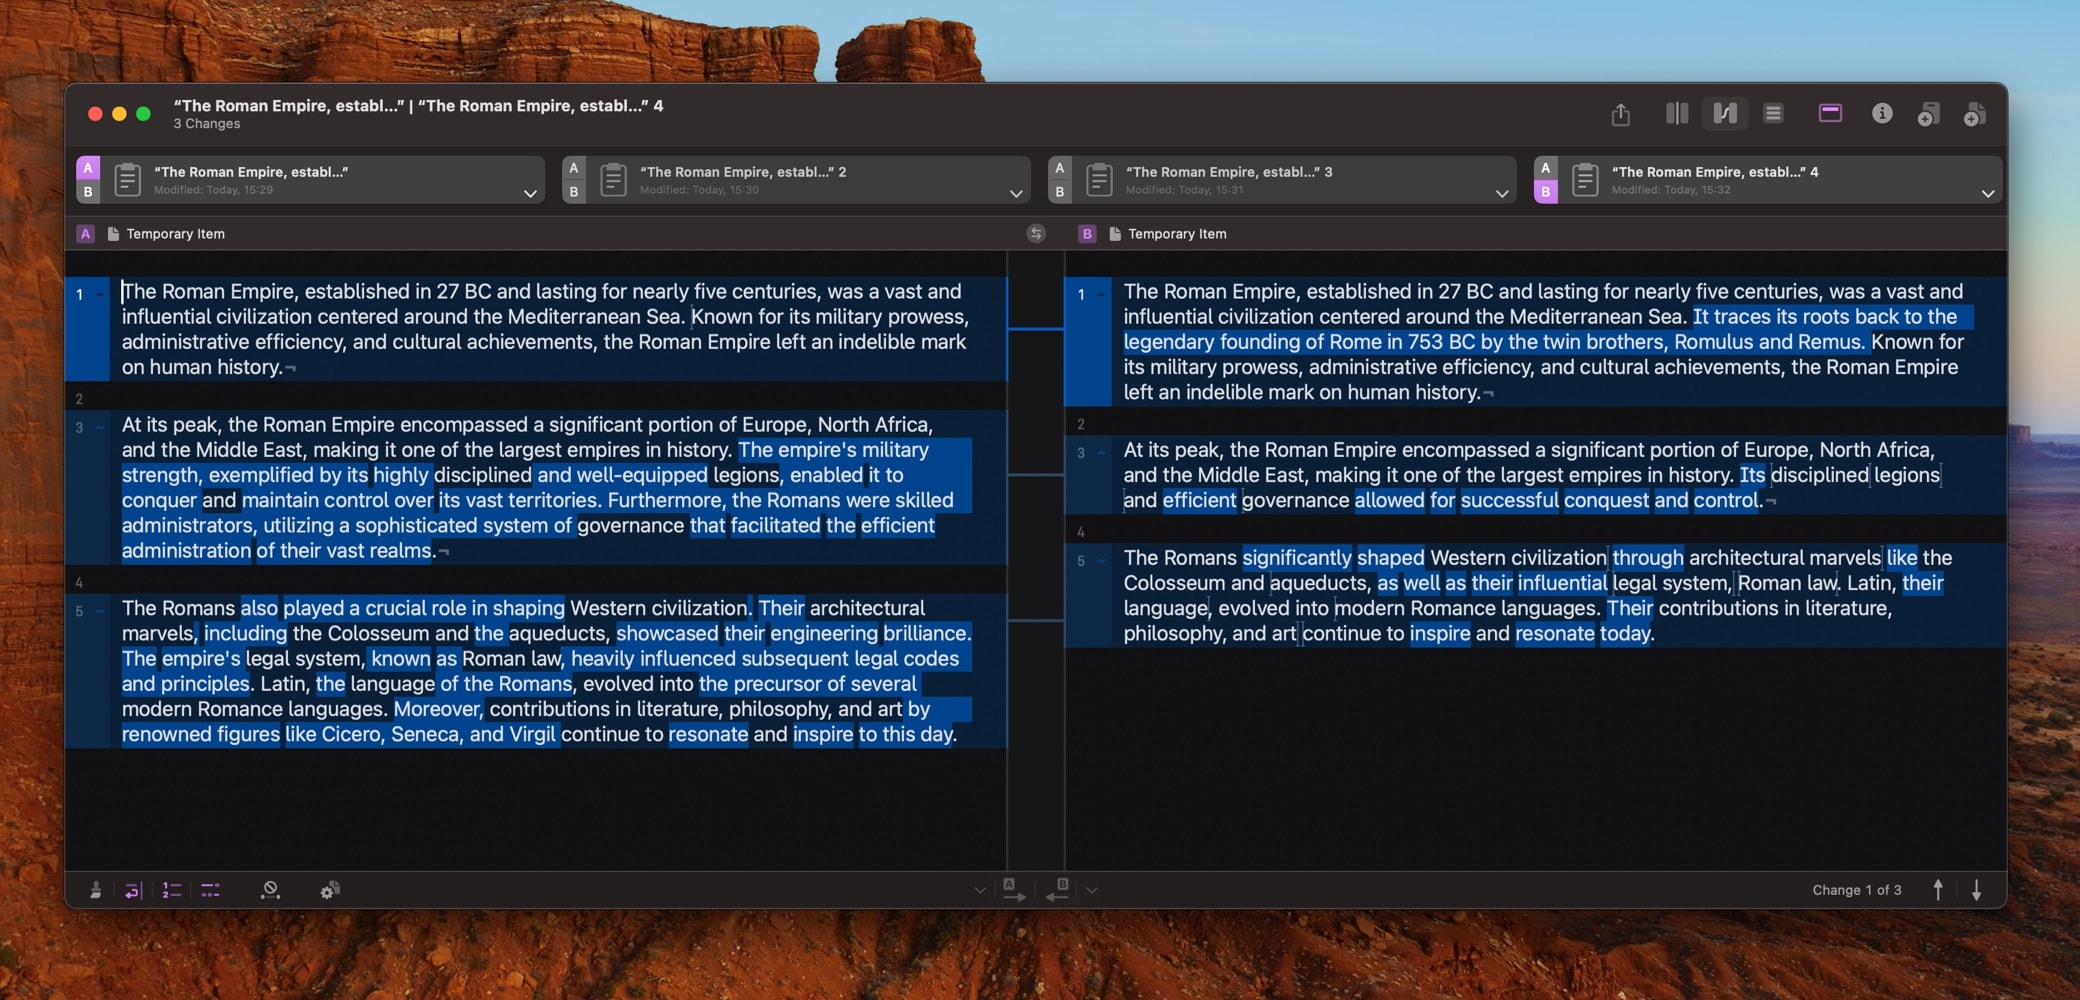
Now I can compare those results, using the variety of tools we covered in part 1 of this series. Next steps might be:
Copy the best result to the clipboard
Maybe I am happy with one of the results that ChatGPT delivered. One way to use that result is to copy that result to the clipboard again and paste it wherever I want to use it.
So next, I’ll bring up the contextual menu on the File Shelf item I want to copy. This can be done either by a secondary click (a right click or ctrl click) anywhere on the item, or by clicking the small arrow button on the bottom right edge of the item.
From the menu, I select Copy Contents. Now I can paste my results into the app I am using as next step in my task.
Save the best result to a file
Perhaps I want to store that best result in a text file for further use. I bring up the contextual menu as I did above, but now select Save As…. This brings up a regular save dialog, letting me choose location and file name.
Once again, I am ready to continue my overall task.
Creating a mix of two versions and fine-tune that result
For my personal taste, ChatGPT hardly ever delivers exactly what I want, despite the amount of work I put into crafting prompts. Most of the time, it’s much quicker to take parts from two different versions that I like. But even then, I tend to change a few bits.
Getting AI chat content into Kaleidoscope
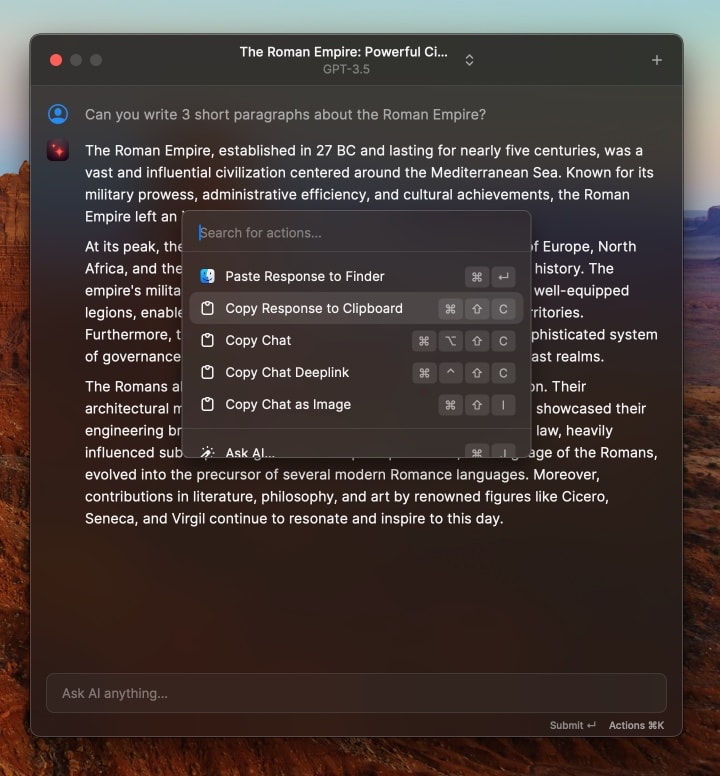
The initial request I typed to ChatGPT via Raycast was Can you write 3 short paragraphs about the Roman Empire?. As requested, 3 paragraphs of text came back.
The keyboard shortcut ⌘K brings up action commands in the AI chat window. I selected Copy Response to Clipboard.
Then I clicked the Kaleidoscope Prism icon in the menu bar and selected Send Clipboard …to New Comparison:
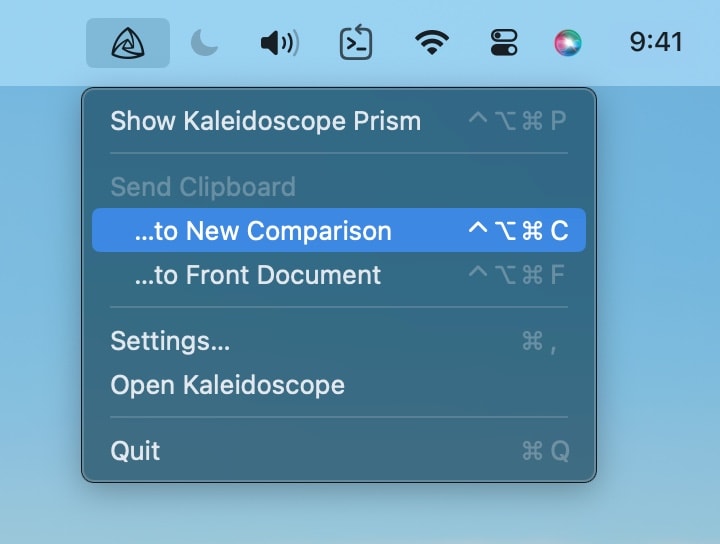
This command opened Kaleidoscope and created a new text comparison with the clipboard contents in side A.
Hint: if you want to learn more about Kaleidoscope Prism, see our blog post on the topic.
For subsequent items, a new, even quicker option appeared: Raycast offers to paste the response directly into the app that is currently in front. So once a Kaleidoscope document was created, I was able to send the response to Kaleidoscope directly via a single shortcut:

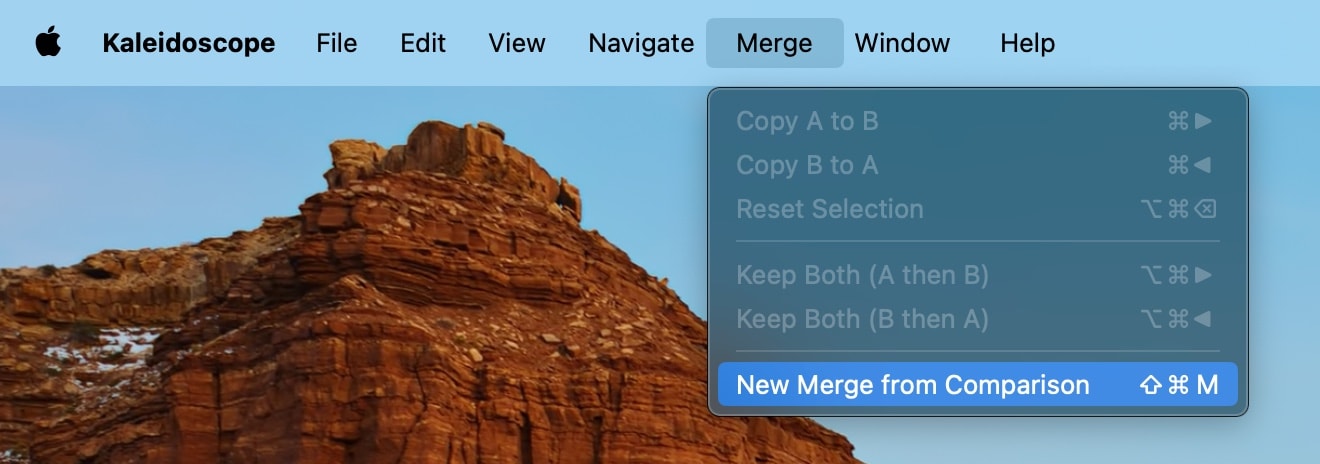
To solve that puzzle, we need a slightly different approach. First, I make sure that the two best versions are selected as A and B. Then I select Merge > New Merge from Comparison from the menu. This opens a new merge document with the two previously selected results as A and B and a merged version in the middle. Now I can copy from A and B to the result as I like, and I can also freely edit the merged result.
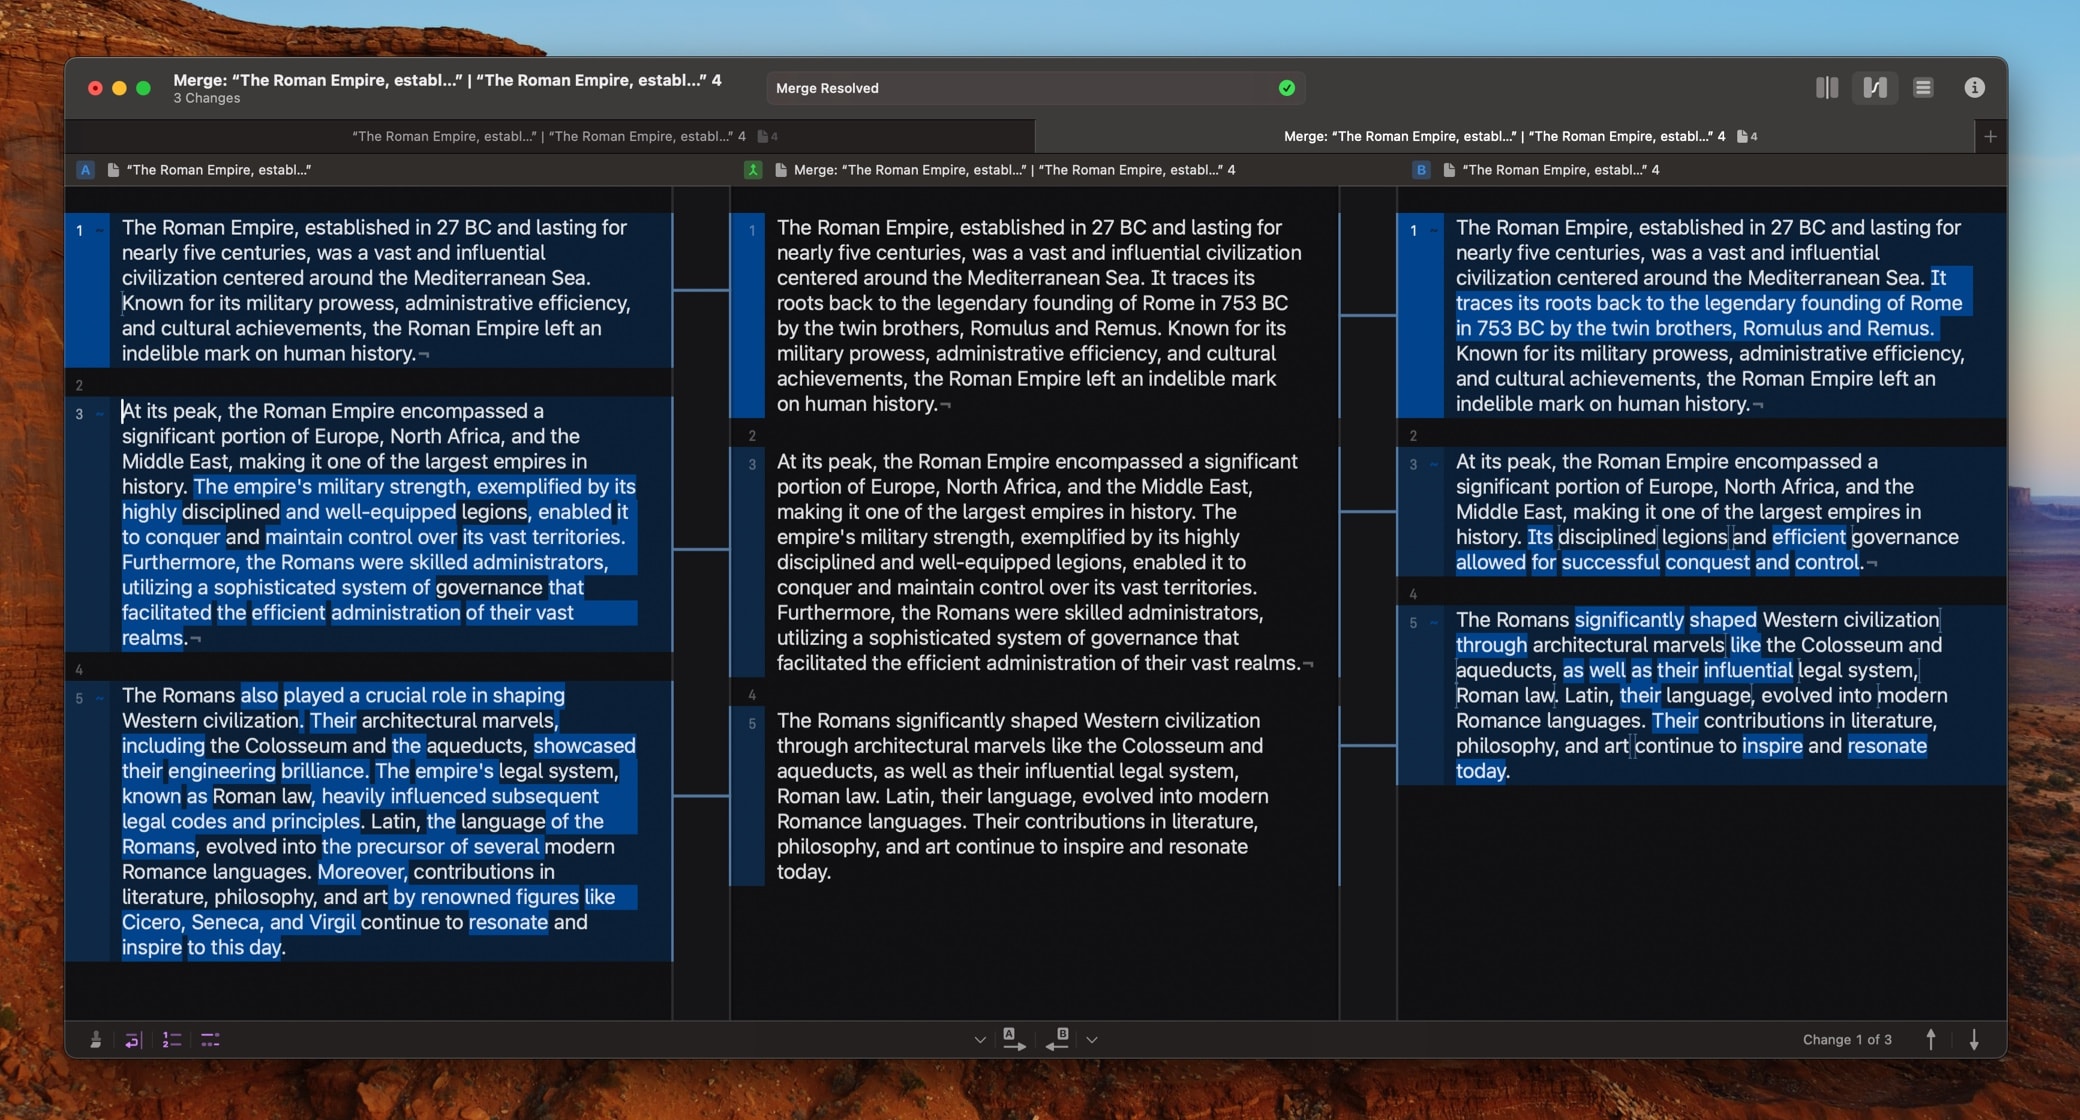
Once I am satisfied, I select File > Save… or simply close the document, which will lead to a save dialog, asking me to provide location and file name for my merge.
ksdiff
On other occasions, content comes into Kaleidoscope from the Unix command line or other integrations, such as the Xcode debugger command kspo. In those cases, I may need a way to remember what each case exactly was, so I know what I am comparing in Kaleidoscope.
One way to organize is to drag File Shelf items into the order that makes most sense to you, as we demonstrated in part 1. At times, it may be better to rename the File Shelf items. That’s why Kaleidoscope has a feature to set a display name. Open the contextual menu as we did above, and select Set Display Name. You can also do this by double-clicking the name itself. Now you can enter a name that helps you remember what the item is. End editing with the enter key. For example, when dealing with multiple debug runs, you can now name items “Run 1”, “Run 2”, etc.
In other cases, it may be useful to open the content from Kaleidoscope in some other app. Use the Open With submenu for that.
And finally, if you want to reorganize your comparisons, you can use the Move to New Comparison command to move that item to a new comparison. Note that you can also drag and drop items between documents, as explained in part 1. And in case you want to get rid of an entry, choose Remove from the contextual menu.
Git Items
We also wanted to point out that Kaleidoscope can automatically create File Shelf entries on your behalf. When opening a file that has multiple revisions in Git, Kaleidoscope can retrieve other revisions from that repository in order to let you compare contents. See our article on the Git File History for that. The app will create and reuse entries in the File Shelf as needed. But it will never remove the file you opened.

You can easily spot those Git items visually. The names are set in italics and their short hash is displayed in the top right corner. (Protip: you can do a secondary click on that short hash to bring up a contextual menu that allows copying the hash.)
With all of that information, you are ready to work with content coming into Kaleidoscope from anywhere and get organized in the way you need to. Is Kaleidoscope missing an important feature for your workflow? Tell us what you need so we can improve the app!